
Muzzy Lane LTI 1.3
Updated 9/29/26
Overview
For integration testing we create an organization account for the partner on our service and assign a unique key and secret to the account for use in OAuth authentication.
Launch ConfigurationLTI 1.3 endpoint URL:
Request Verb: POST
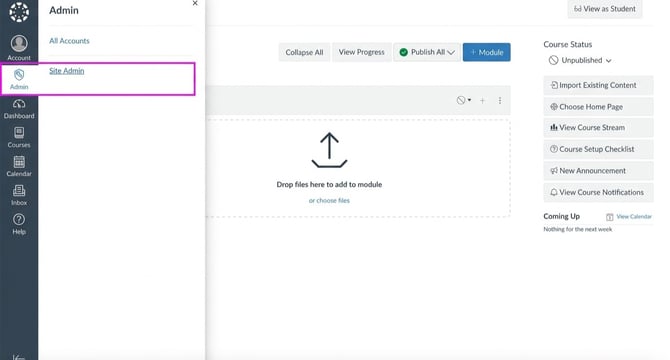
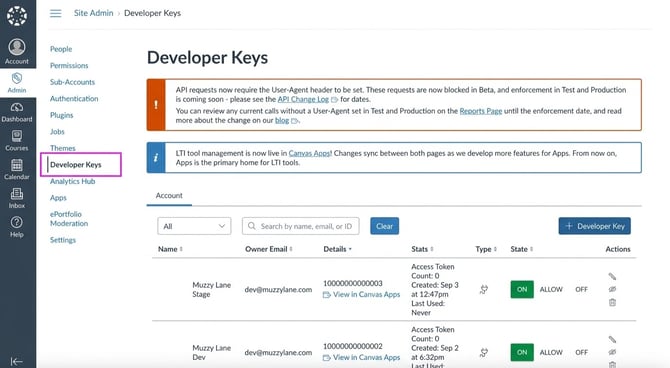
Canvas ExampleCreate LTI Tool at Admin LevelNavigate to Admin > Site Admin > Developer Keys
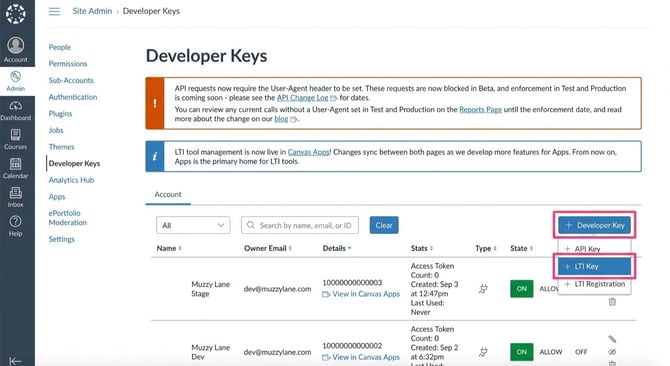
Select + Developer Key and then + LTI Key.
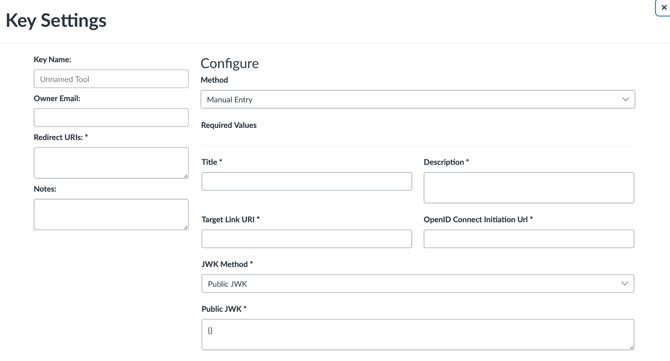
Using Configuration Type “Manual Entry” add:
- Title- Muzzy Lane (you can use whatever title you want for this)
- Description- Muzzy Lane Author Activities (you can use whatever description you want for this)
- Target Link URI- https://author.muzzylane.com/authoring/oidc/launch
- OpenID Connect Initiation Url- https://author.muzzylane.com/authoring/oidc/login
- JWK Method- Public JWK URL
- Public JWK URL- https://author.muzzylane.com/authoring/oidc/jwks.json
Also, under Redirect URIs, Paste the following links:
https://author.muzzylane.com/authoring/oidc/redirect
https://author.muzzylane.com/authoring/oidc/launch
Also, under Key Name, label the key as “Muzzy Lane,” or whatever name would be most useful to you.
Be sure to also include your email address under “Owner Email.”
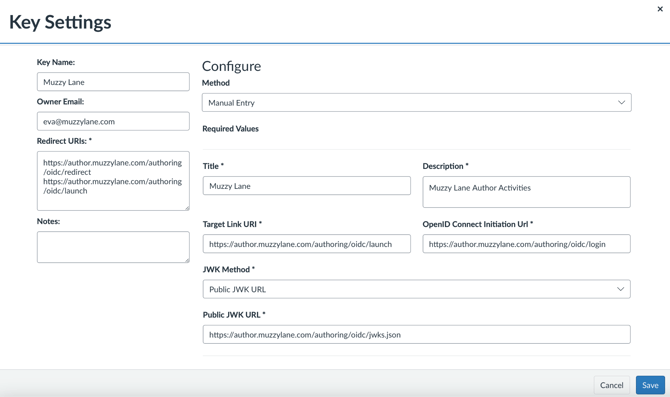
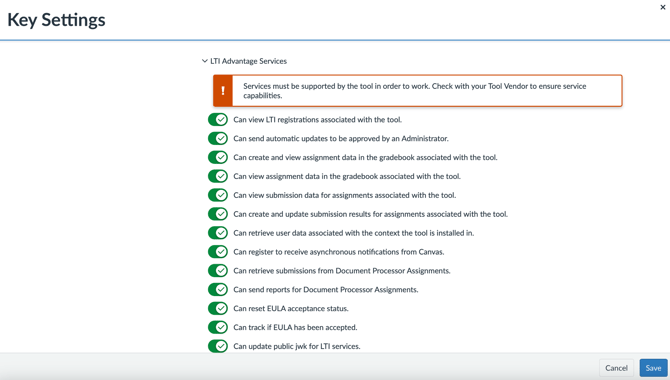
Scroll down to view the rest of the settings. For LTI Advantage Services, toggle on services you think would be of use to you. This can always be edited later.
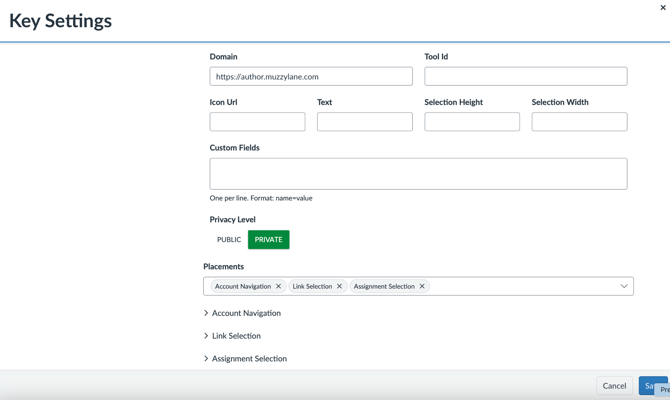
For the remaining settings, you can customize the tool however you like. We recommend putting https://author.muzzylane.com in the domain under “additional settings” and adding assignment selection to the default placements.
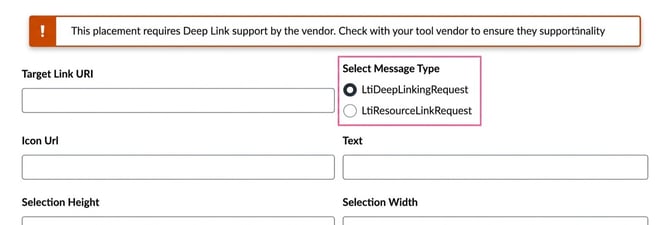
Under “Assignment Selection,” you can select “LTIDeepLinkingRequest” so that when you go to add an assignment in a course, you will get menu of activities to pick from.
Save your developer key.
Now, toggle the key from “off” to “on.”
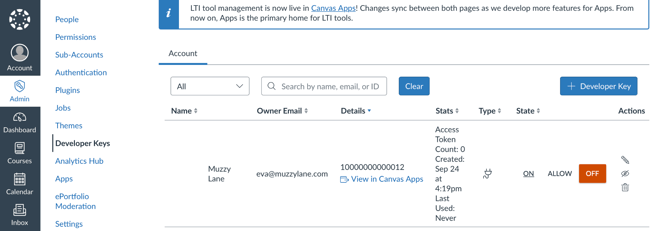
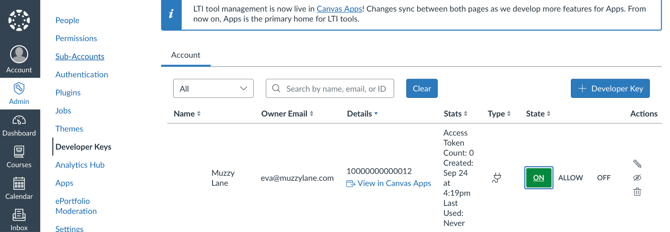
Note: The number under “details” is your ClientID
Contact Muzzy Lane TeamBefore you can proceed, contact the Muzzy Lane team so we can get you configured from our side. We will need the following information from you:
- Client ID (aud)
- Deployment ID
- OIDC Auth URL
- OAuth2 Access Token URL
- JWKS URL
Here’s how to find the ClientID and DeploymentID:
Navigate to: admin → Site Admin → Developer keys 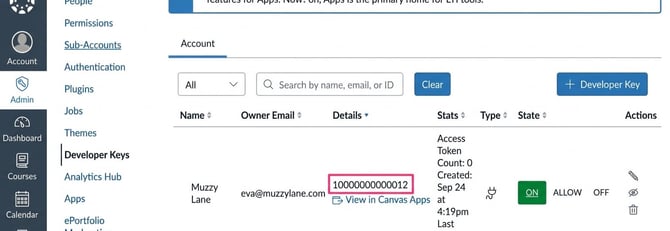
The number outlined in the image above is your Client ID
Click on “View in Canvas App”
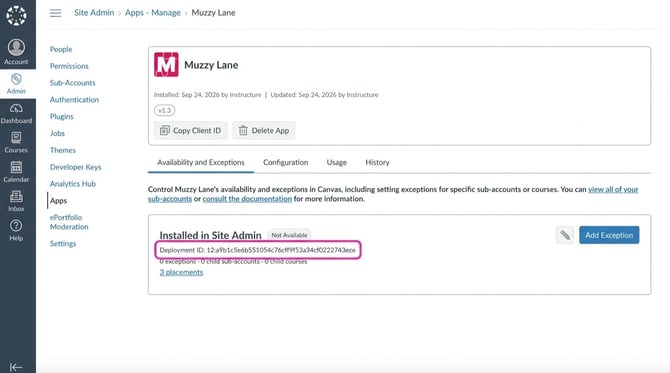
The number outlined in the image above is your Deployment ID
Add LTI Tool to the CourseNow that you have set up the developer key, you can add it as an app in your course(s).
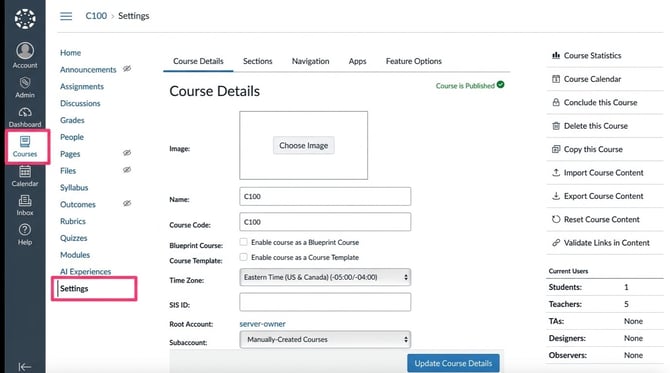
Navigate to Courses > Settings
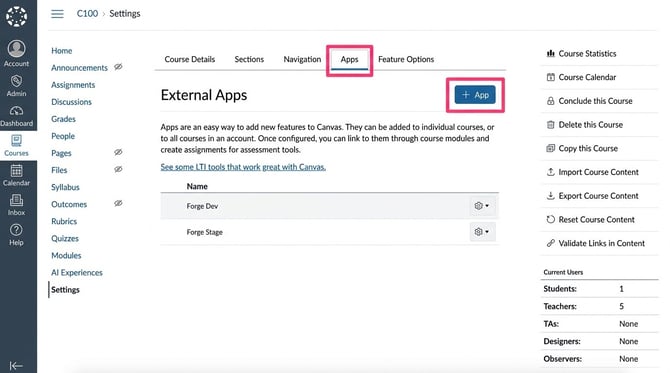
At the top, click on “Apps,” and then “+App”
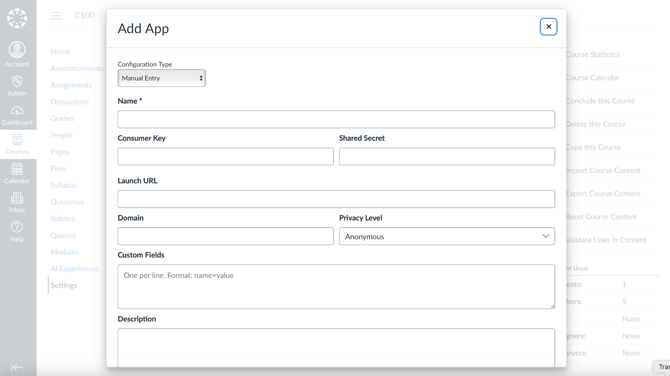
In the dropdown, change the Configuration Type to “By ClientID.”
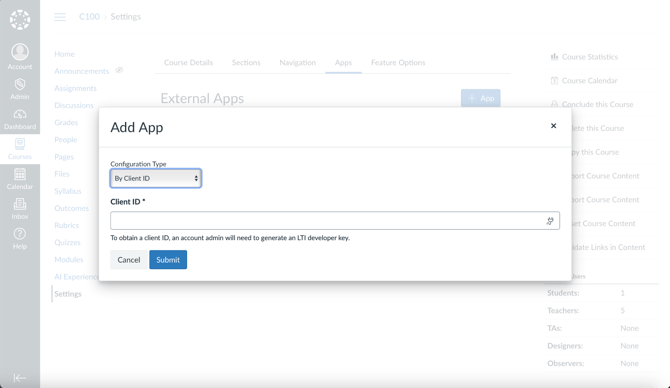
Type your Client ID and click “submit.”
Create Assignment Using LTI ToolNow, you can create an assignment in the course.
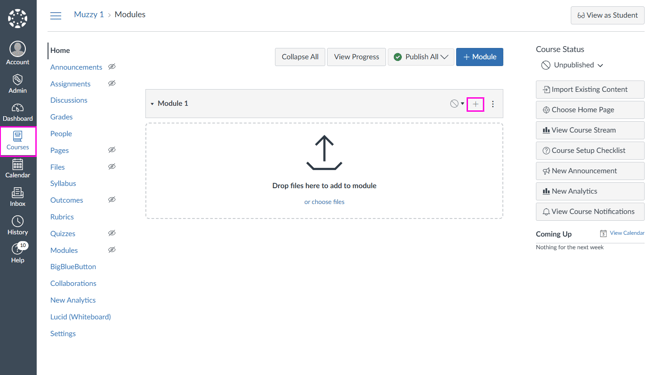
In assignment configuration:
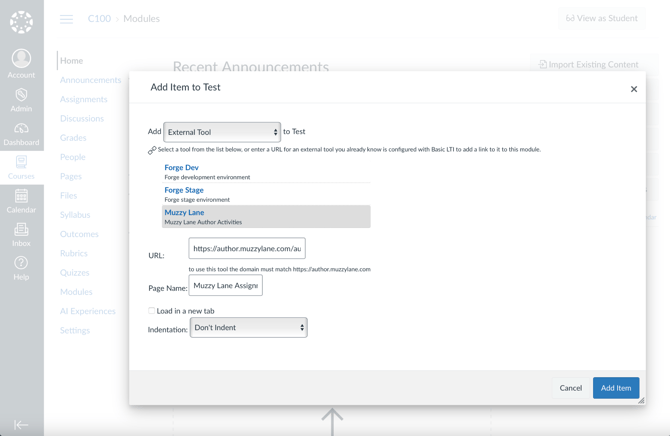
- Choose External Tool from dropdown
- Select tool created in Create LTI Tool at Admin Level
- Leave auto-fill URL unaltered
- Add assignment name as Page Name
- Select Add Item
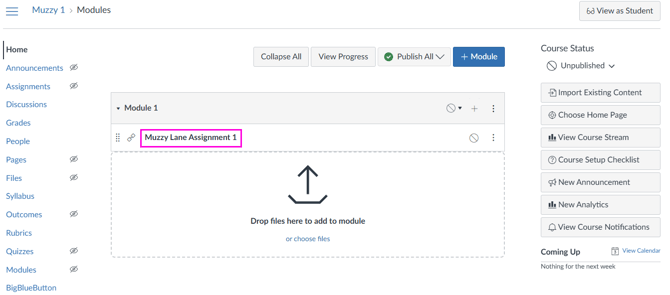
Select the newly created activity name from the module list to launch as instructor.
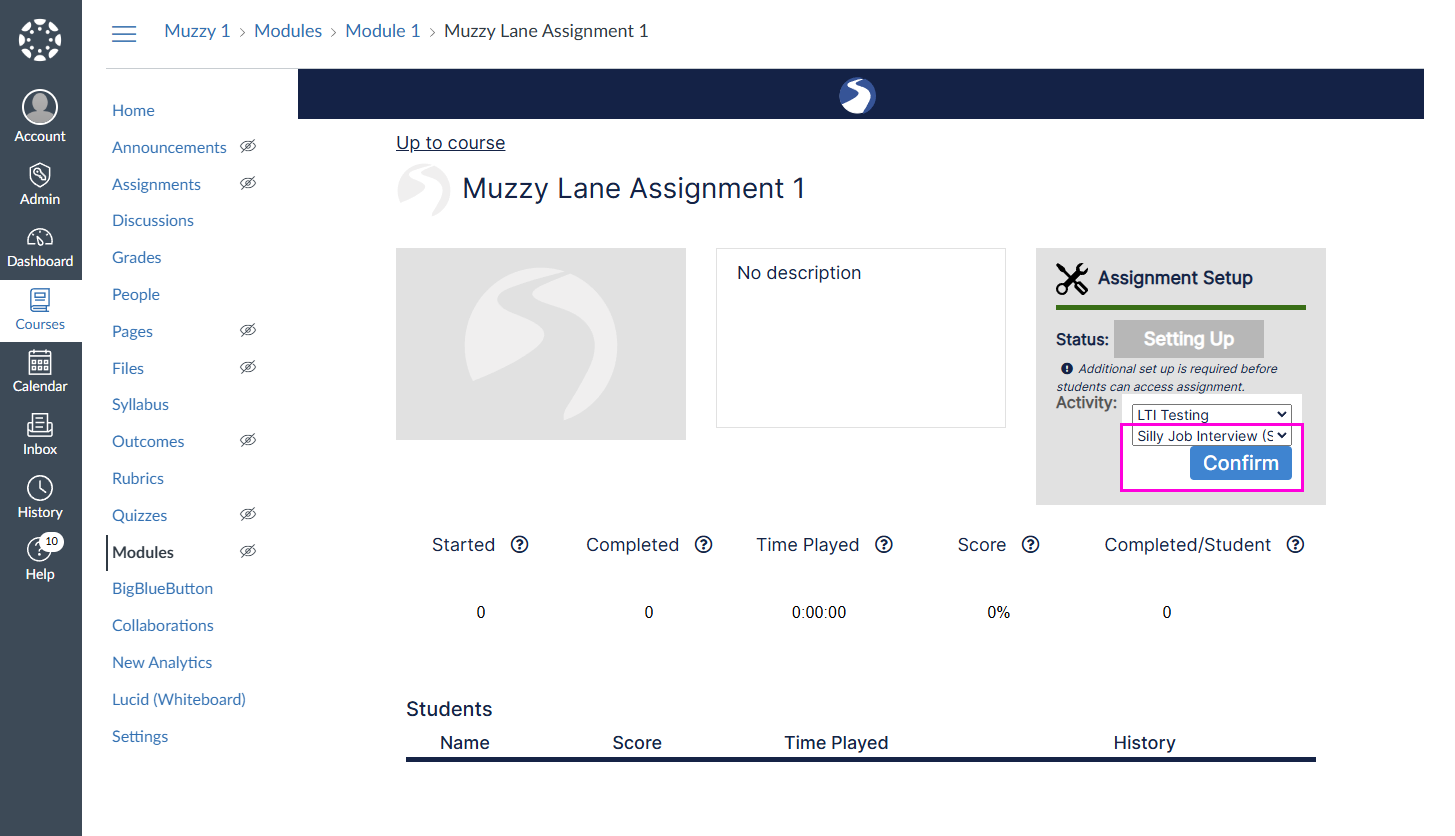
In the Assignment Setup area, select the project containing the desired activity.
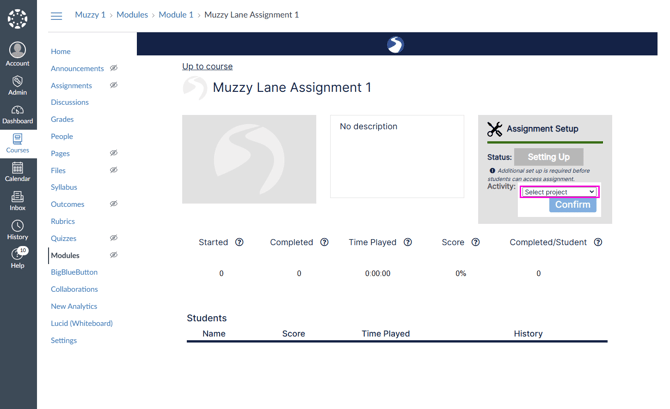
Then select the desired activity from the dropdown.
Select Confirm.
If desired, change default Score Type or Max. Attempts from defaults.
Select Set Up.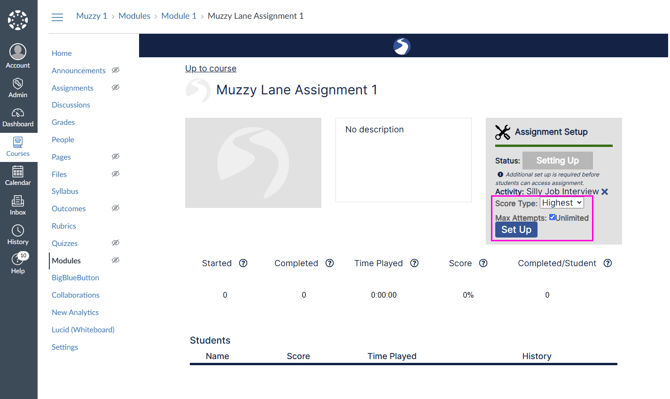
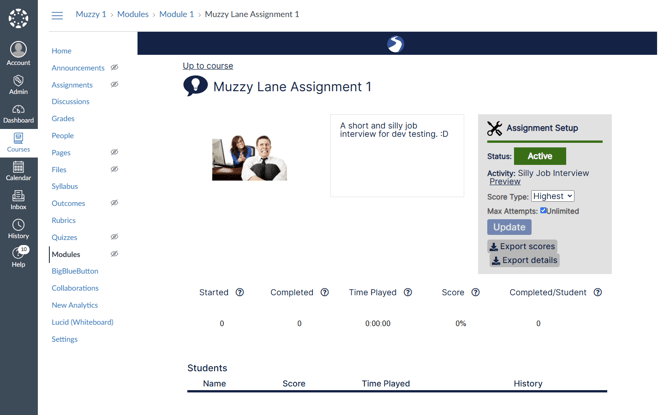
Done! The assignment is now ready for students. (Note: Score Type and Max. Attempts may be updated until the first student launches and begins an attempt)
For a PDF download of this article, click here.